By guest blogger Daniel Schroen, Primary Cells specialist and VP of Cell Applications, Inc.
Introduction to Culturing Primary Cells
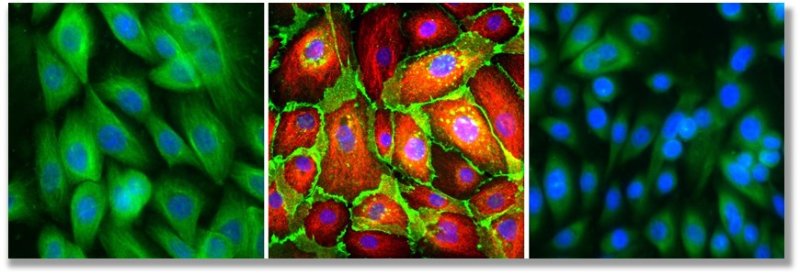
Because they are derived directly from living tissue, primary cells maintain physiological relevance and thus find increasing use in life science research and pharmaceutical drug discovery. Compared to immortalized cell lines, however, primary cells can be finicky and present challenges during culture unless proper care is taken. Following the steps outlined below, will help you achieve optimal results with primary cells.
Receipt, Storage and Transport of Primary Cells
• Upon arrival, immediately remove the cryovials from their dry ice packaging and transfer them to a liquid nitrogen storage tank.
• During transport, always keep the cryovials submerged in dry ice.
• Do not expose the cryovials to ambient temperature, as this could damage cryopreserved cells and compromise their performance.
Preparation for Primary Cell Culture
• Prior to working with the cells, review the accompanying cell-specific steps and suppliers instructions. Don’t be tempted to work from memory, even if you are experienced in the field, and don’t be tempted to substitute your own favorite protocol even if “it’s always worked well for me in the past”. Every supplier has already optimized these procedures. If your favorite protocol worked better, then it would be the one that the supplier recommends.
• Adhere to standard, accepted guidelines for sterile technique, laboratory safety and equipment, such as appropriate eye and skin protection when moving the vials to and from liquid nitrogen storage.
• Work with the cells in a Class II Biological Safety Cabinet and culture them in a humidified incubator set to 37°C and 5% CO2.
• Turn on the water bath, set its temperature to 37°C at least one hour in advance, and check the temperature with a thermometer prior to thawing the cells.
• Ensure that you have the optimized, cell-specific growth media specifically recommended by the supplier. Don’t substitute your own “secret recipe”.
• Confirm that your cell culture flasks are appropriately treated for primary cell culture.
• To reduce the chances for contamination, use 70% isopropyl alcohol to wipe down working surfaces, media bottles and thawed cyrovials.
Thawing of Primary Cells
• Fill an insulated container half way with dry ice pellets.
• Retrieve the cryovial from liquid nitrogen and submerge it in dry ice until ready for use.
• Turn the vial cap one quarter to release any liquid nitrogen or pressure that might have built up in the cryovial, and then re-tighten it.
• Thaw the cells quickly by placing the lower half of the vial in the 37°C water bath, monitoring the vial closely as it thaws.
• Take the vial out of the water bath when there is still a small amount of ice remaining in the vial. This step takes approximately 60 to 90 seconds. Do not let the cells thaw completely.
• Decontaminate the vial exterior with 70% isopropyl alcohol.
Plating of Primary Cells
• Remove the vial cap carefully and do not touch the rim of the cap or the vial with your fingers.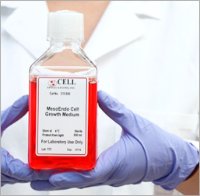
• Re-suspend the cells in the vial by gently pipetting 3 times with a 1 ml pipette. Be careful not to pipette too vigorously as to cause foaming.
• Pipette the 1 ml cell suspension from the vial into the T-75 flask containing 15 ml of Growth Medium.
• Cap the flask and rock gently to evenly distribute the cells.
• Loosen the cap to allow gas exchange, and place the T-75 flask in the incubator.
• For best results, do not disturb the culture for at least 4 hours.
• Change to fresh Growth Medium after 4 hours, or the next morning, to remove all traces of cryoprotectant.
• Change Growth Medium every other day until the cells reach 60% confluency.
• Double the Growth Medium volume when the culture is >60% confluent or for weekend feeding.
Subculture of Primary Cells
• Do not warm the Trypsin/EDTA Solution or any other subculture reagents to 37°C.
• Also, be sure to use the correct Trypsin/EDTA concentration.
• Subculture the cells when they reach 80% confluence.
• Aspirate away the medium from the T-75 flask.
• Wash the adherent cells with HBSS, and remove by aspiration.
• Pipette 5 ml of Trypsin/EDTA Solution into the T-75 flask and rock gently to ensure the solution covers all the cells.
• Aspirate 4.5 ml of the Trypsin/EDTA solution immediately.
• Re-cap the flask tightly and monitor the trypsinization process at room temperature under an inverted microscope.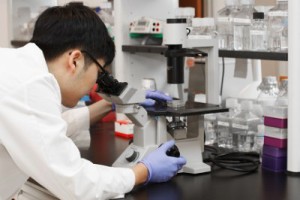
• Watch the cells become rounded, while they are still attached to the flask. This may be about 1 to 2 minutes after the Trypsin/EDTA was added. Do not over-trypsinize by waiting for the cells detach.
• Instead, detach the rounded cells by hitting the side of the flask against your palm.
• Pipette 5 ml of Trypsin Neutralizing Solution into the flask to inhibit further trypsin activity.
• Transfer the cell suspension from the flask to a 50 ml sterile conical tube.
• Add 5 ml of Trypsin Neutralizing Solution to the flask to collect any additional remaining cells, and transfer them to the same conical tube.
• Examine the T-75 flask under a microscope. If there are still more than 20% cells remaining in the flask, repeat the trypsinization steps and add the cells to the conical tube.
• Centrifuge the conical tube at 220 x g for 5 minutes to pellet the cells.
• Aspirate the supernatant from the tube without disturbing the cell pellet.
• Flick the tip of the conical tube with your finger to loosen the cell pellet.
• Resuspend the cells in 2 ml of Growth Medium by very gently pipetting the cells to break up the clumps.
• Count the cells with a hemocytometer, viability reagent or other approach.
• Pipette 30ml of Growth Medium into a T-175 flask or flasks, depending on the cell number. As a general rule of thumb, seed at 5,000 cells per square centimeter.
• Inoculate the T-175 flask or flasks.
• Cap the flask and rock gently to evenly distribute the cells.
• Loosen the cap to allow gas exchange and place the flasks in the incubator.
Following these guidelines will provide you with healthy cells and solid data. These steps were derived from an instructional video published March 2015 – Primary Cell Culture: Protocols & Guidance. The original article by Dan appears here.